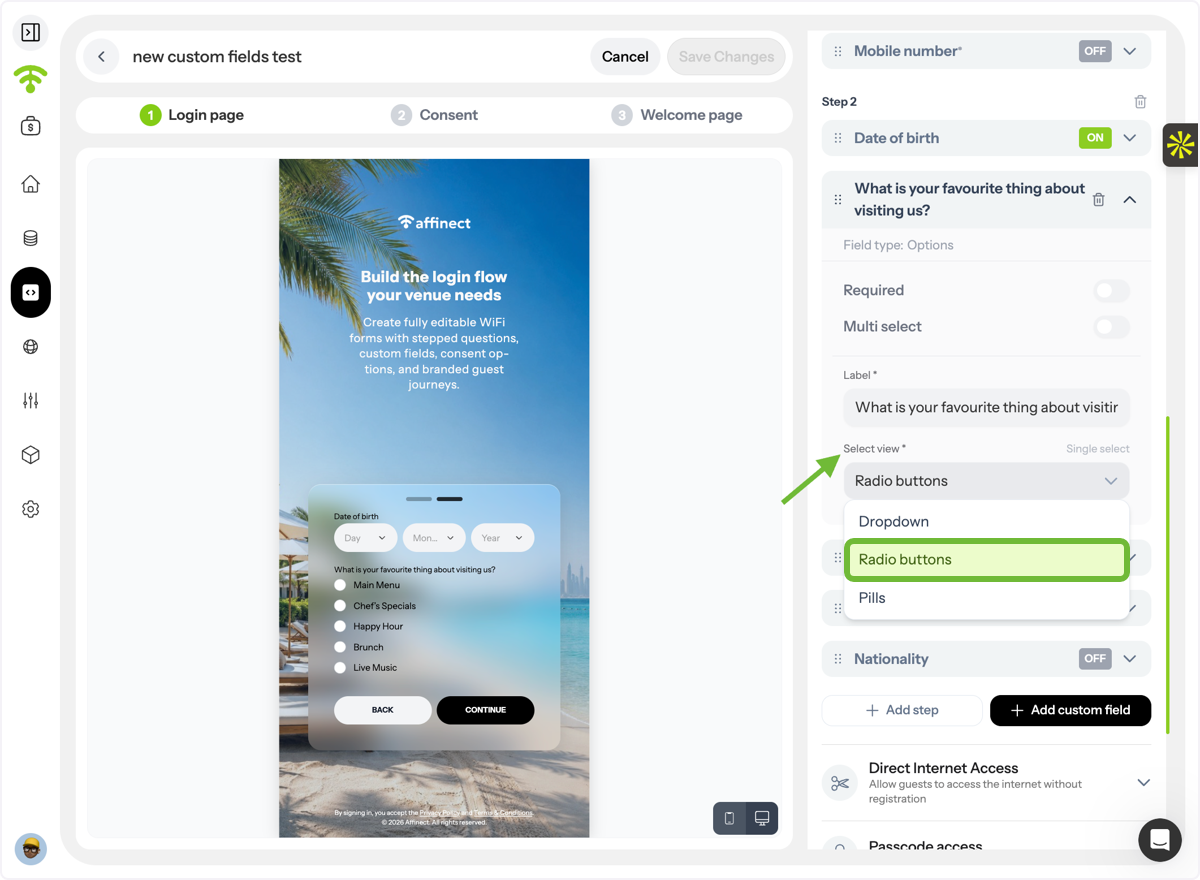
This guide shows you how to fully customize your WiFi login forms and QR forms in Affinect. From branding and colors to form fields and custom data collection, you can create a seamless experience that matches your venue's identity while capturing the guest information that matters most.
Affinect
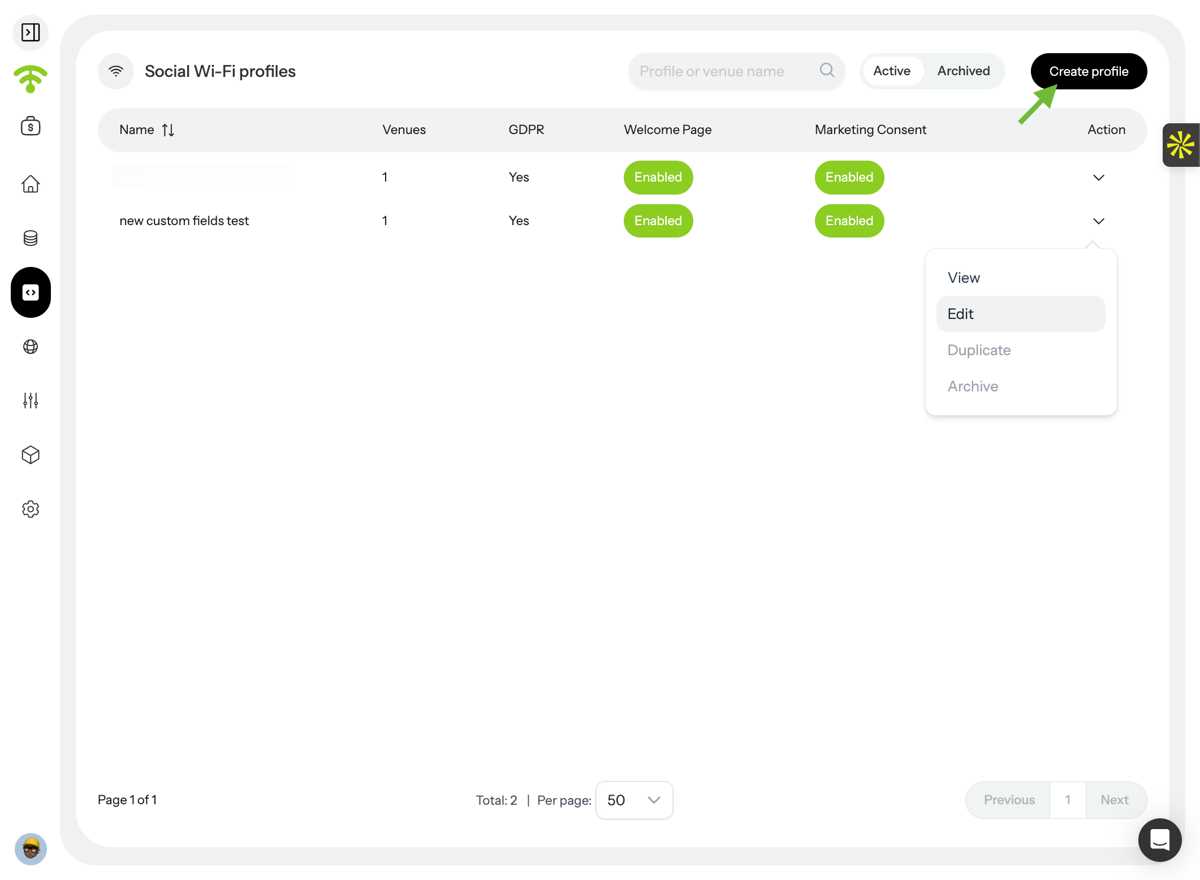
Create a new profile, or select an existing profile and click Edit.
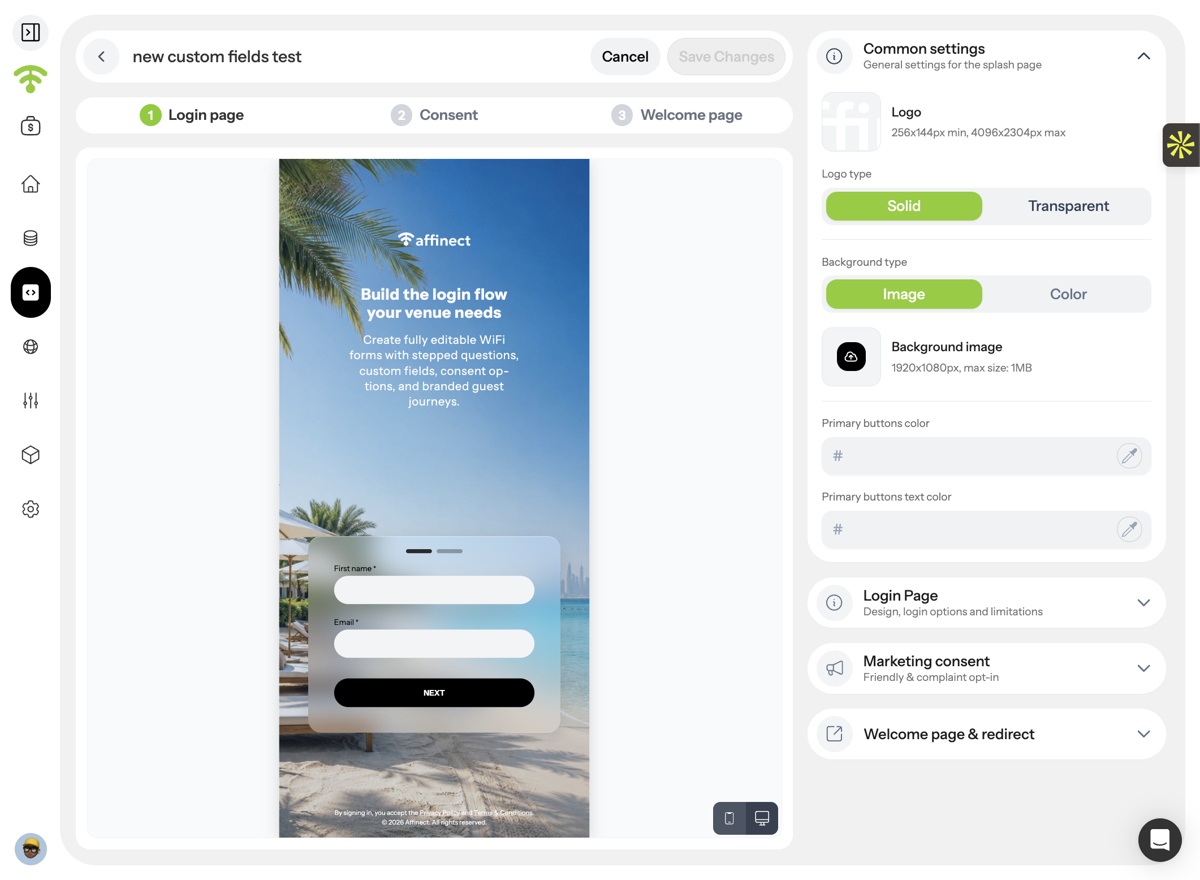
Under Common Settings, upload your logo and choose its display style:
- Transparent
- Solid Background
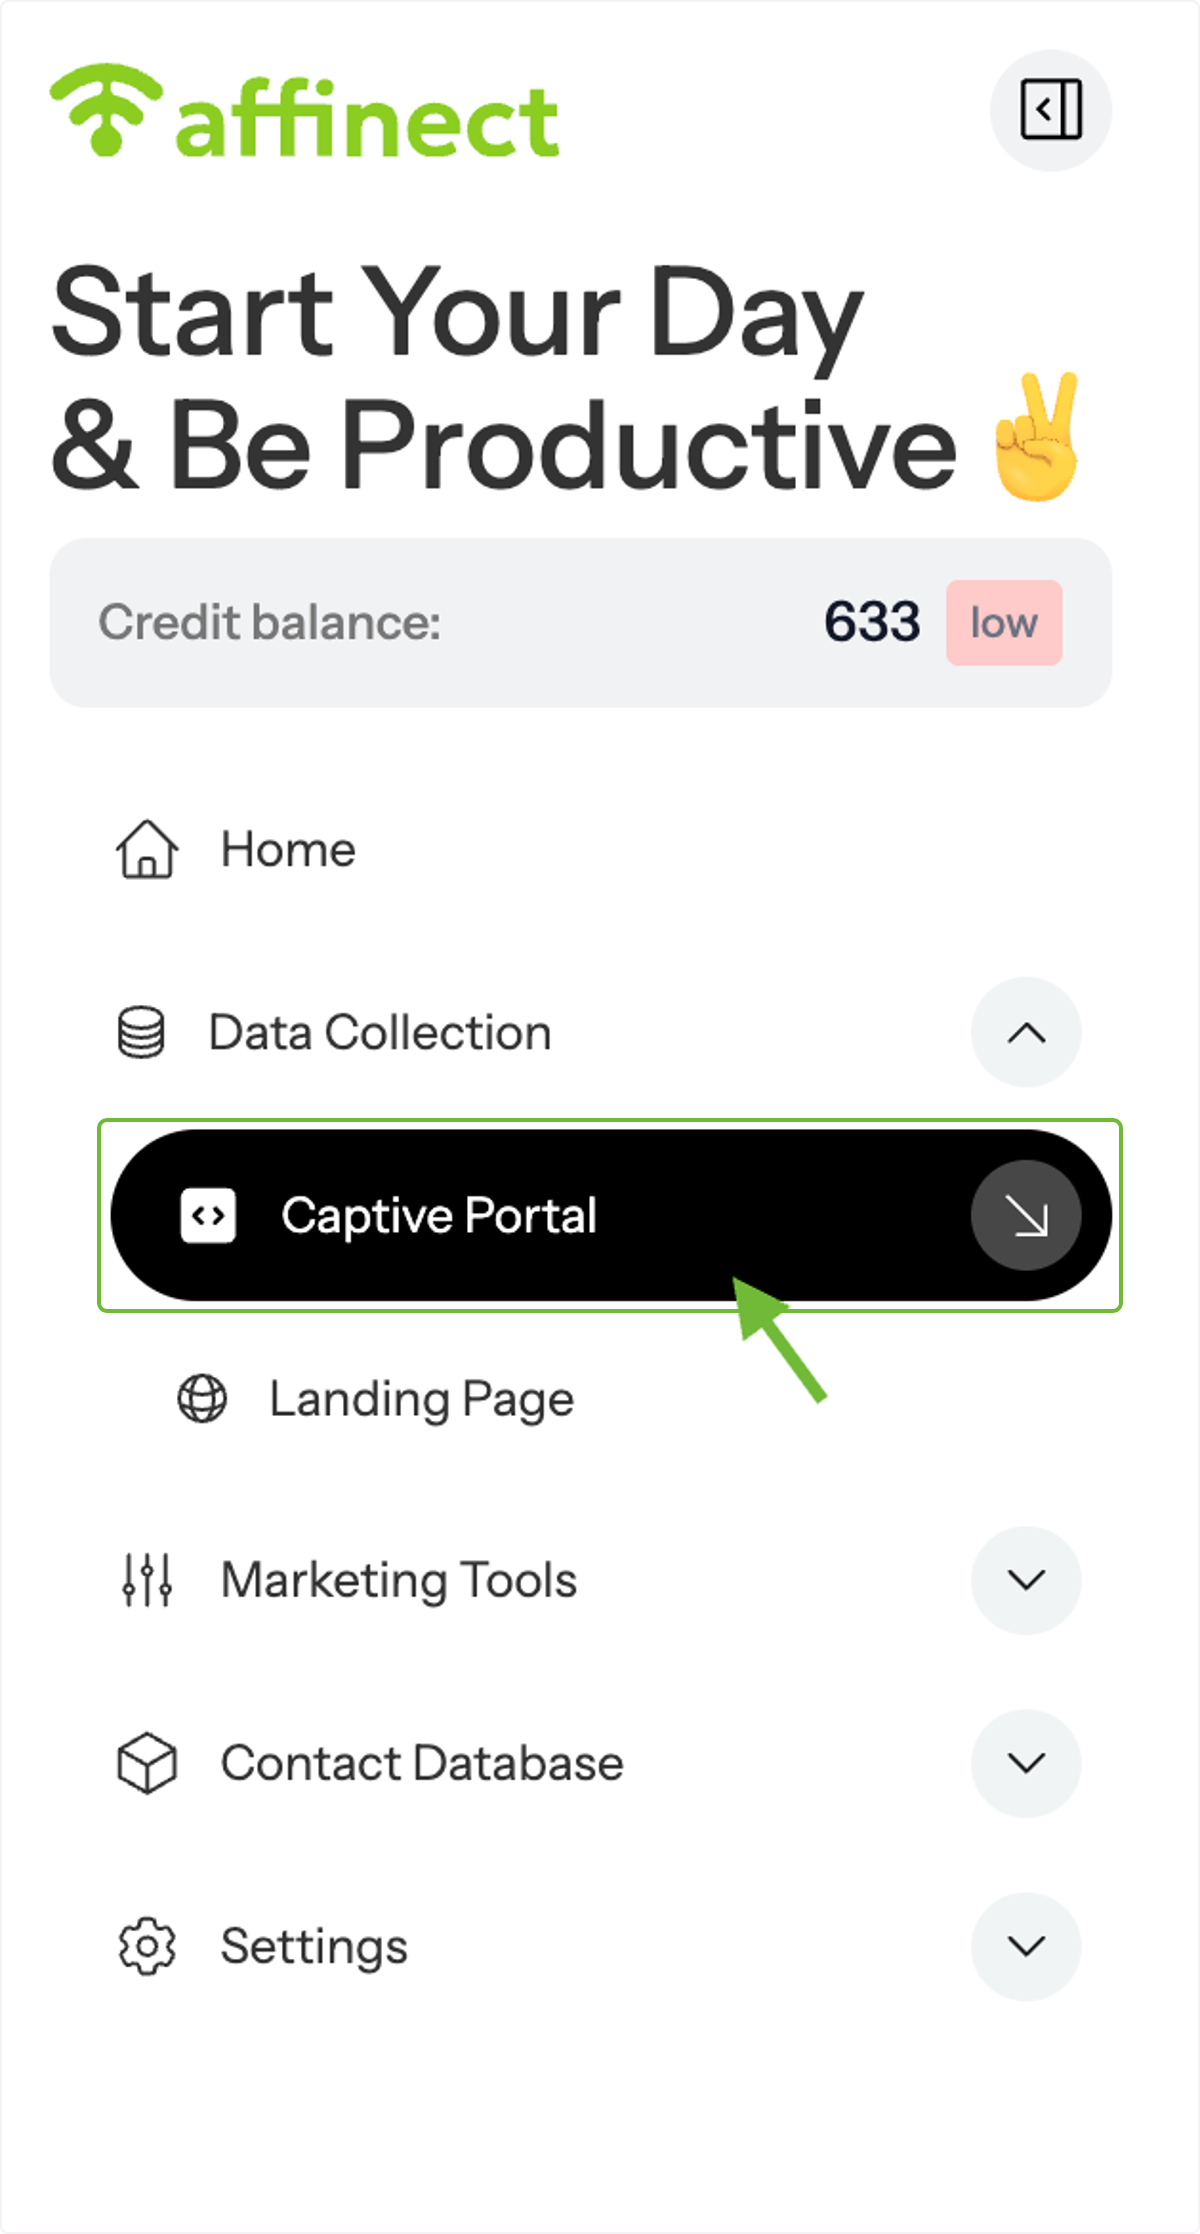
Access Your Form
Navigate to either:
- Captive Portal (for WiFi login forms), or
- Landing Pages (for QR forms)
Both can be found under Data Collection.
A. Create a new profile
B. Edit an existing one
A. Upload Your Logo
B. Select Logo Type
C. Select Background type
Form Design Settings
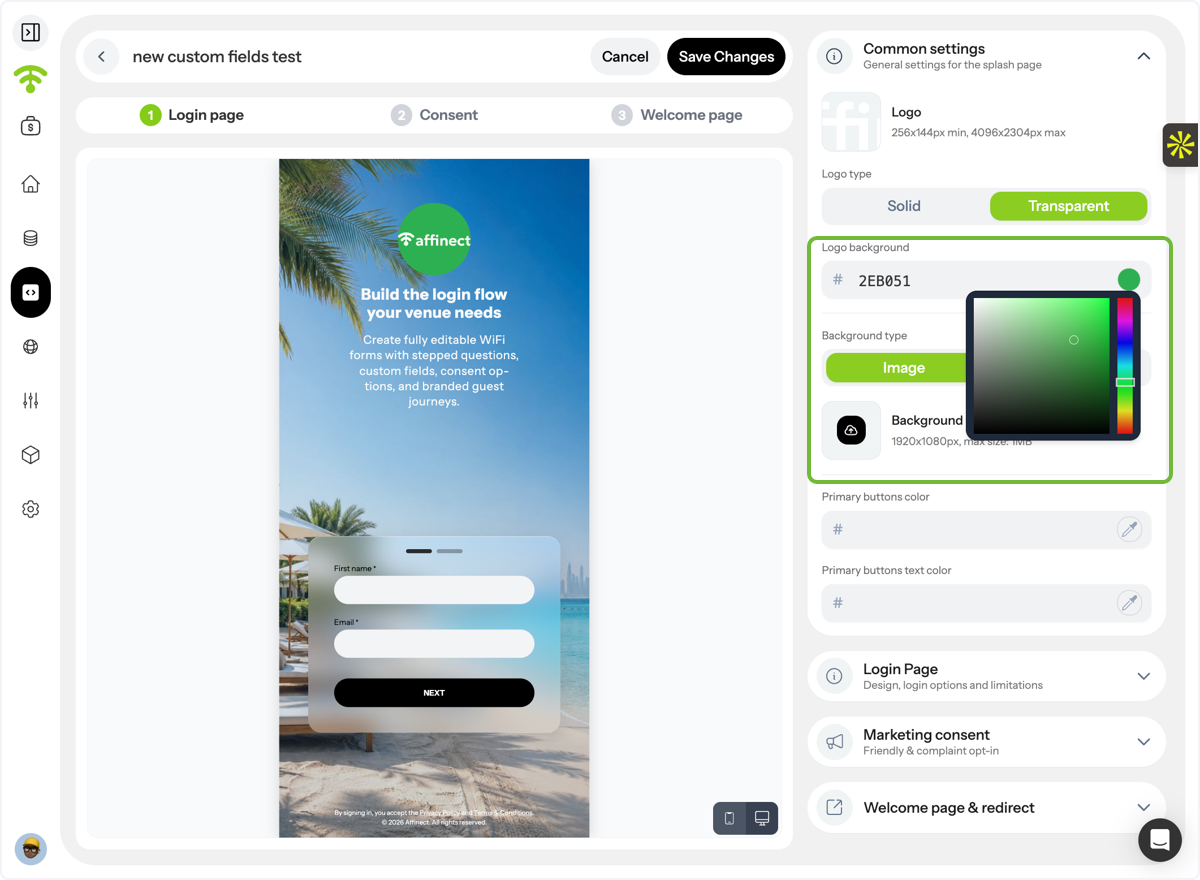
Customize Logo Background
Adjust the logo background color to match your brand identity.
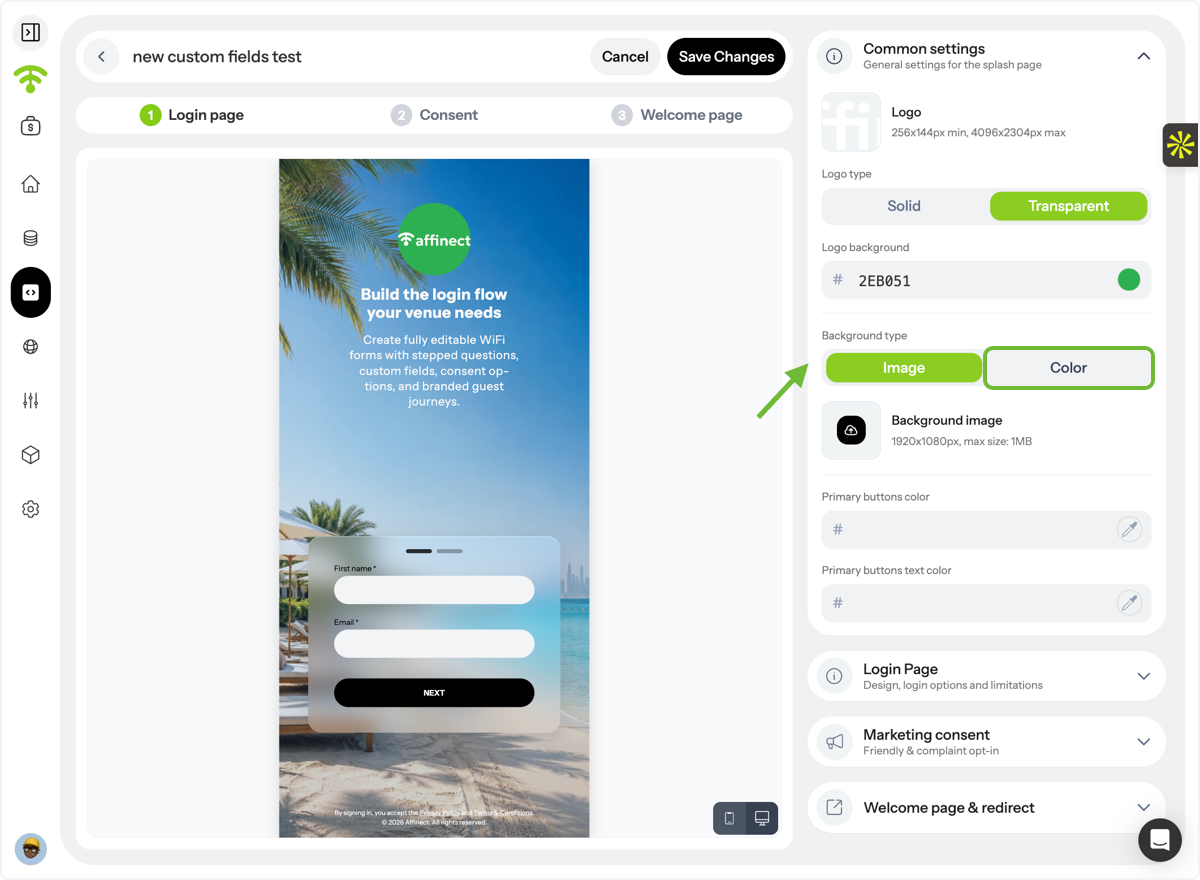
Choose a Background Style
Select whether your form background should use:
- A solid color, or
- A custom image
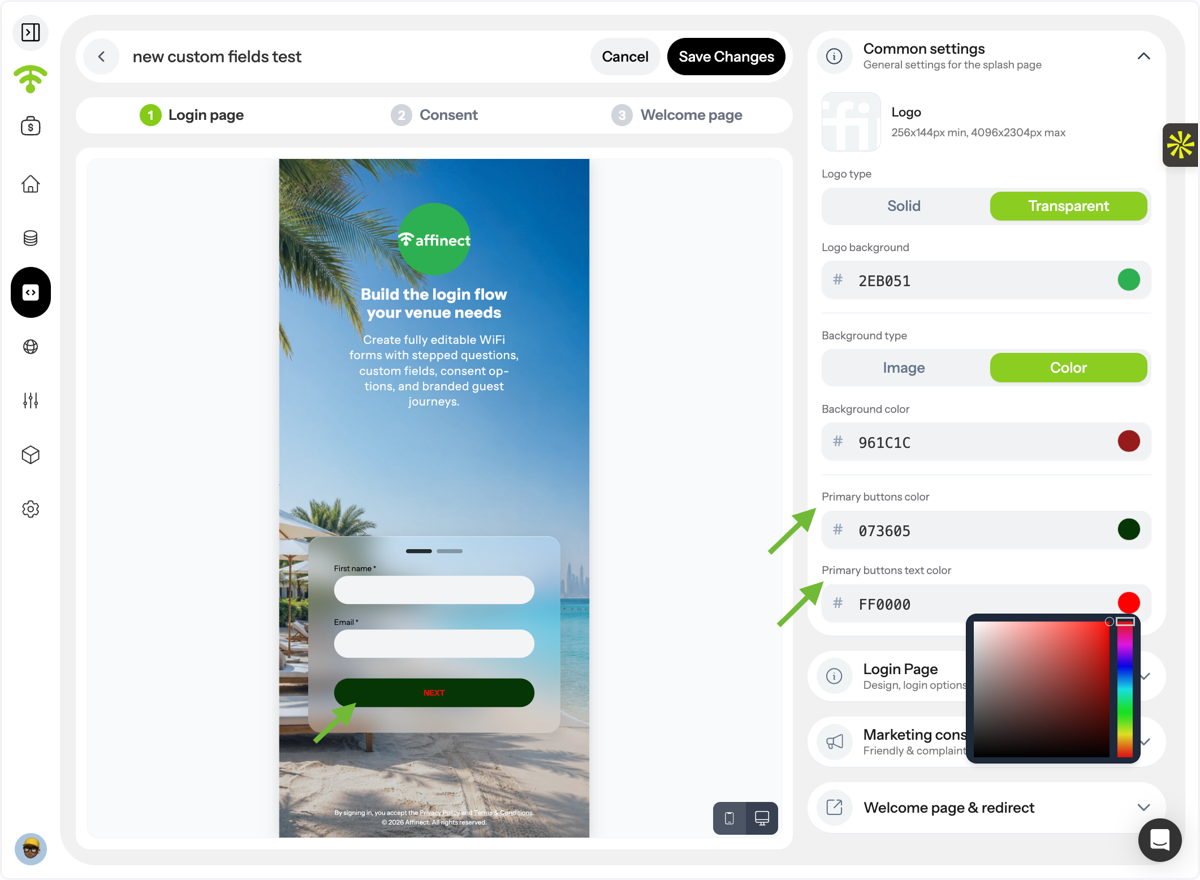
Customize Buttons
Update your primary button color and button text color.
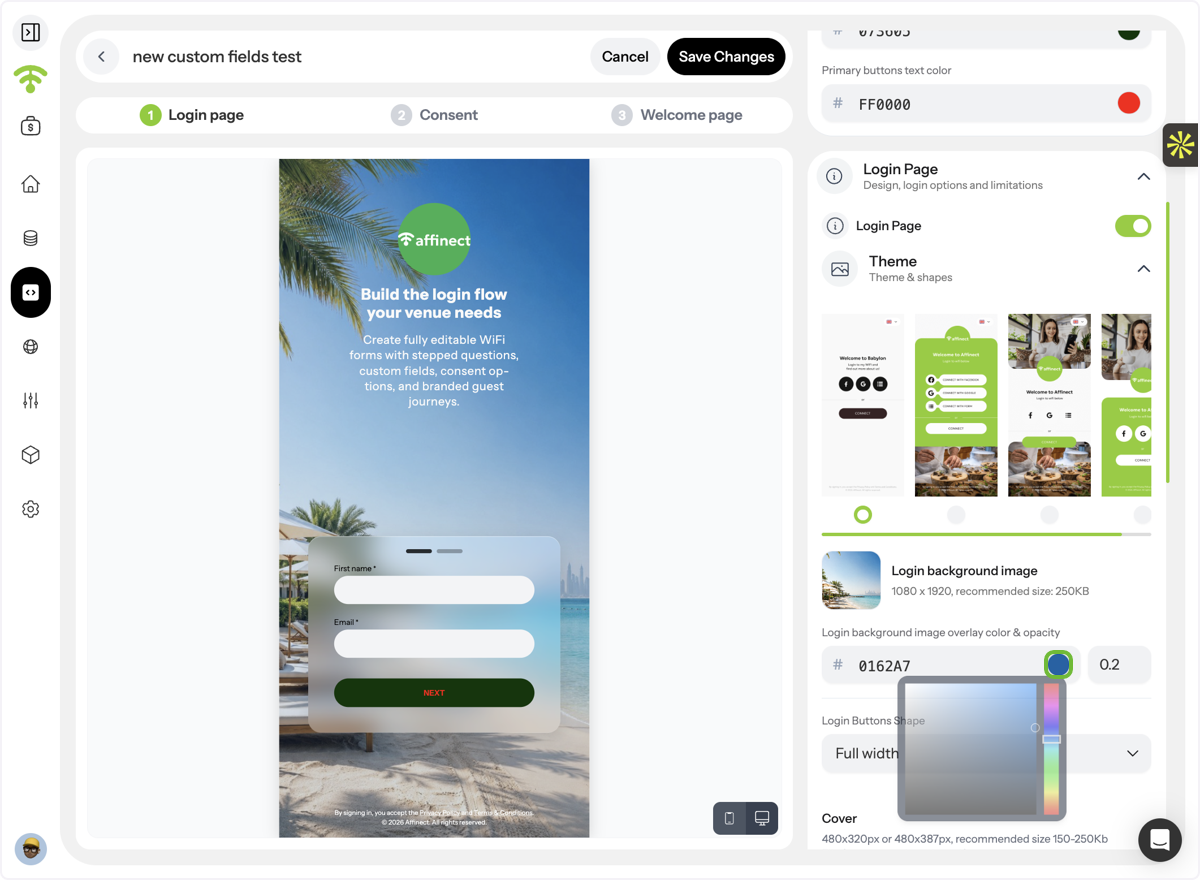
Configure Background Images
Under Login Page Settings, customize:
- Background image
- Overlay color
- Overlay opacity
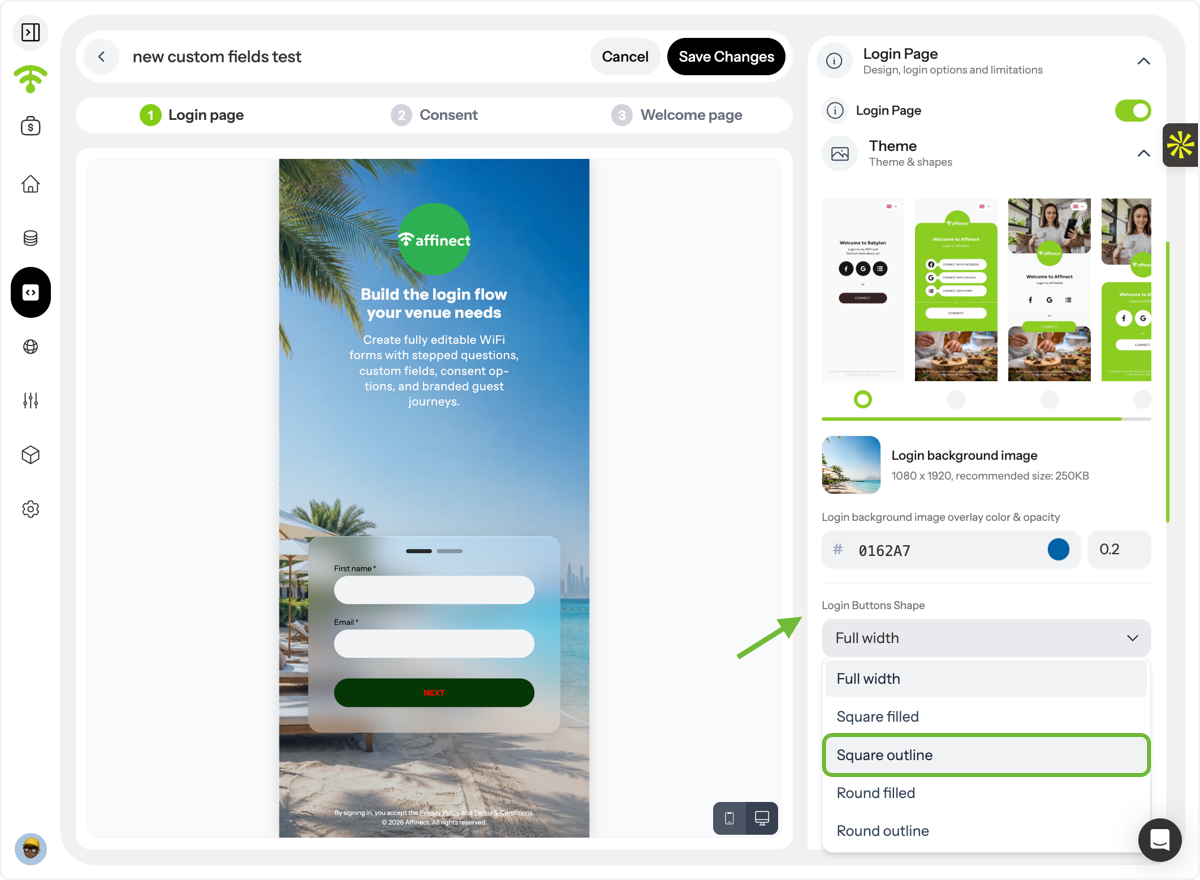
Select Button Shapes
Choose the style and shape of your login buttons.
Add Additional Branding Elements
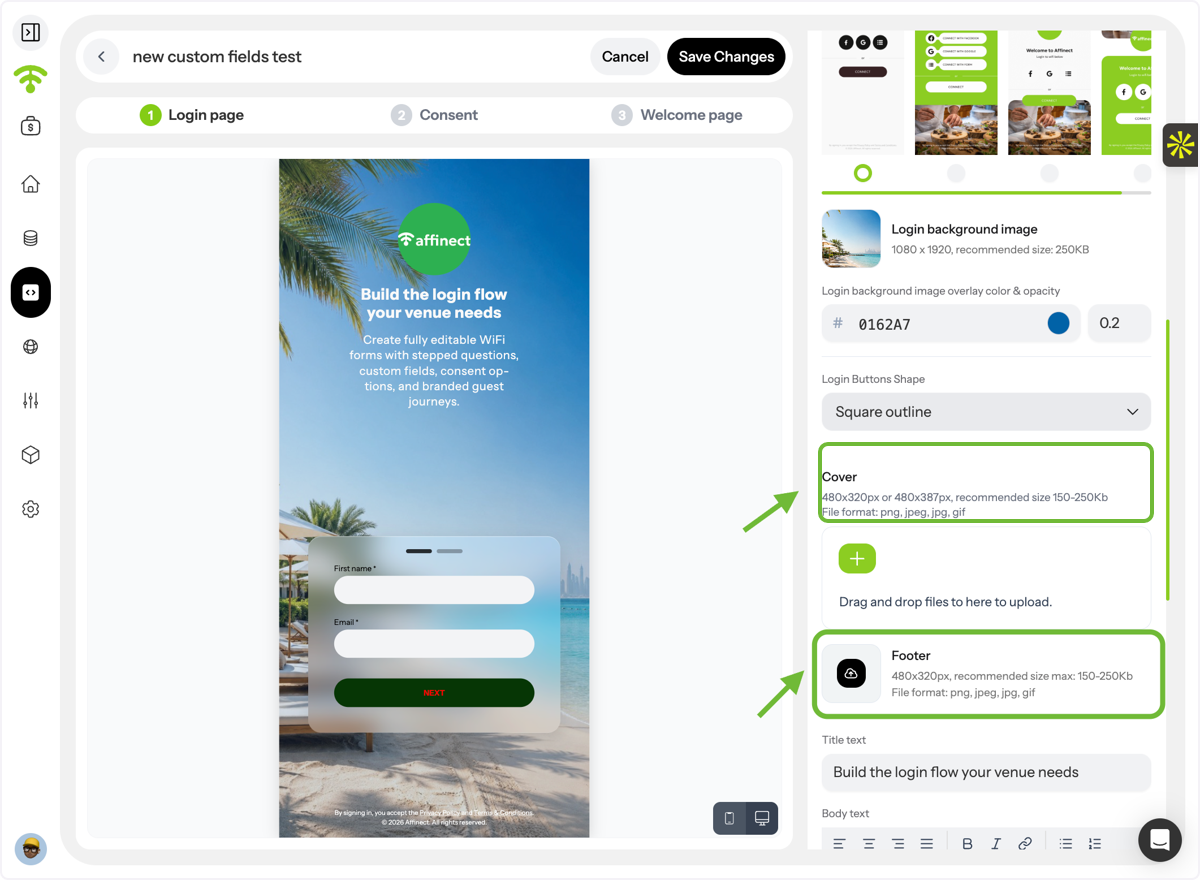
You can upload:
- Cover image
- Footer image
For best results, ensure your images match the recommended dimensions and file formats.
Customize Form Content
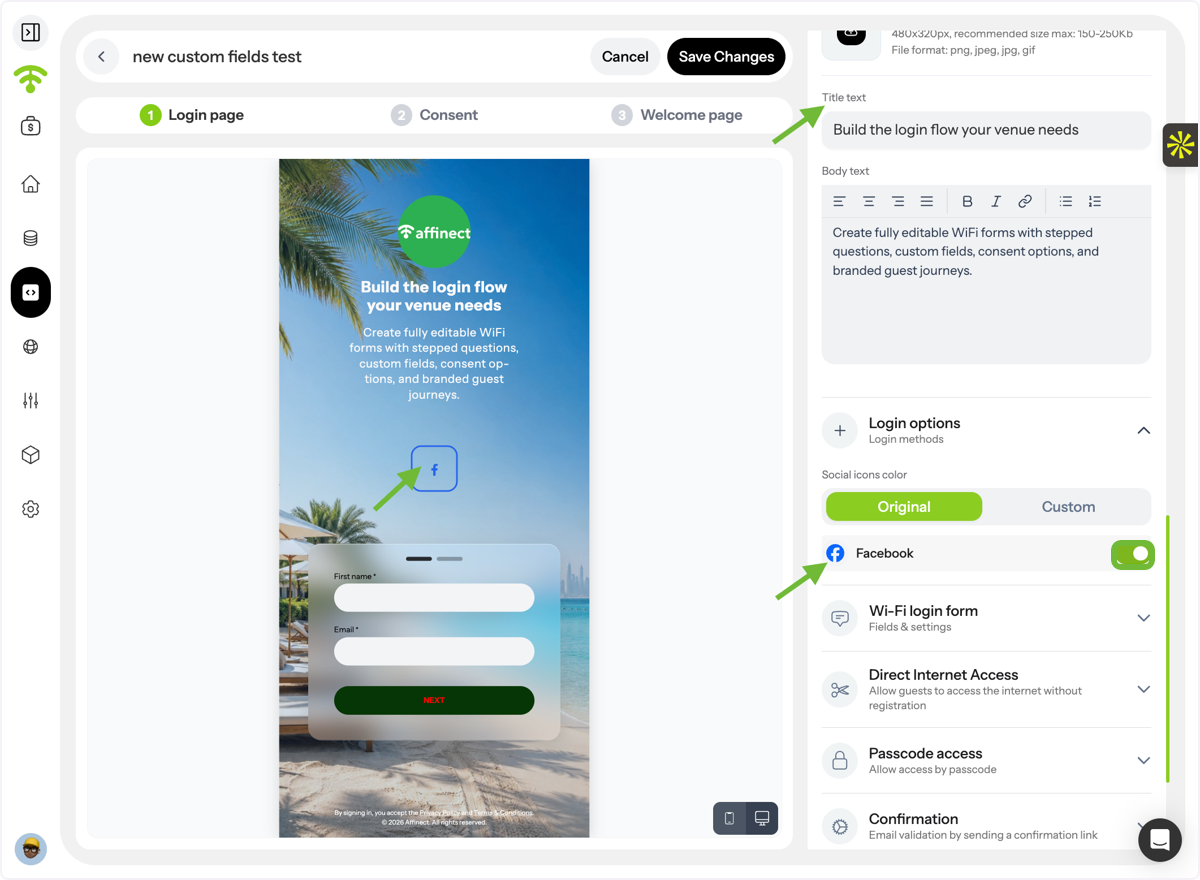
Add and style:
- Title text
- Body text
You can also enable social media icons and choose between:
- Original icons
- Custom icons
Preview your changes as you build.
Form Layout & Styling
Choose Form Display Type
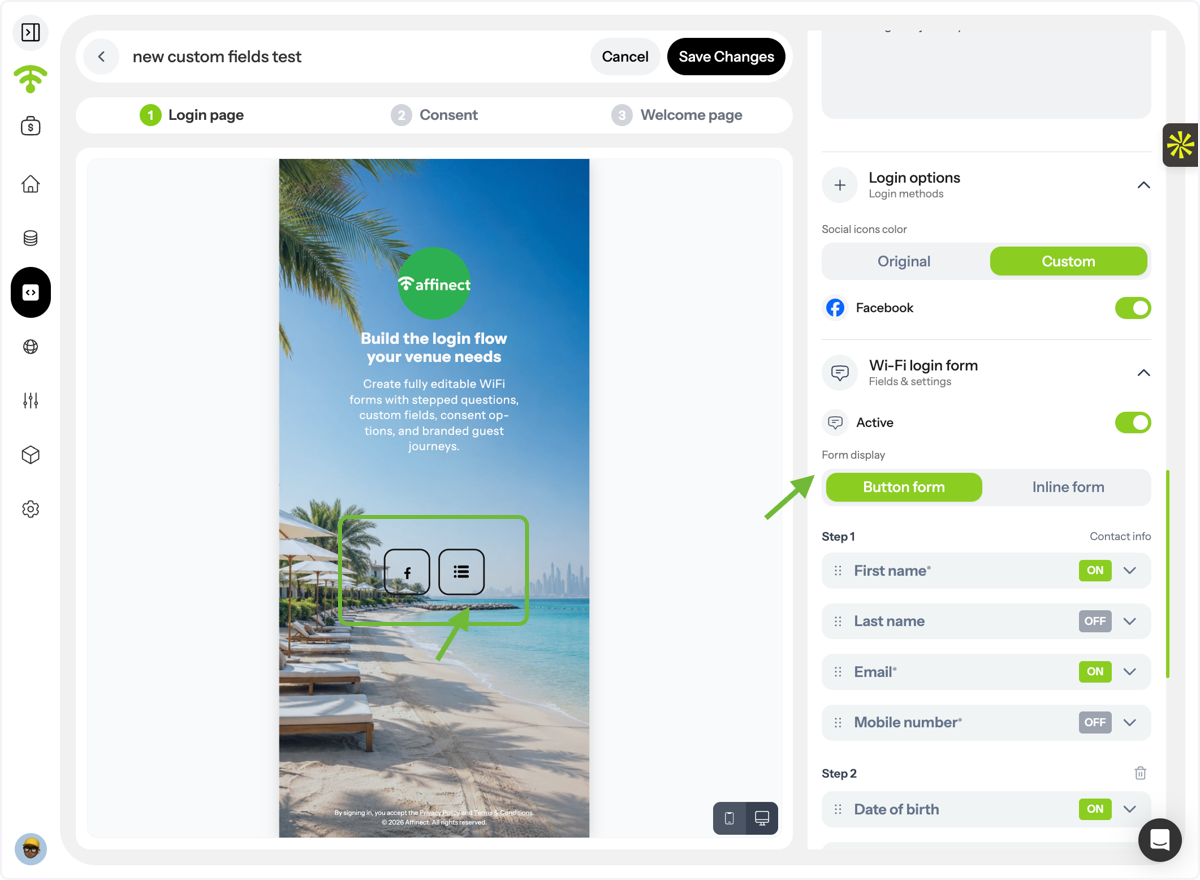
Select how your form will appear:
- Button Form
- Inline Form
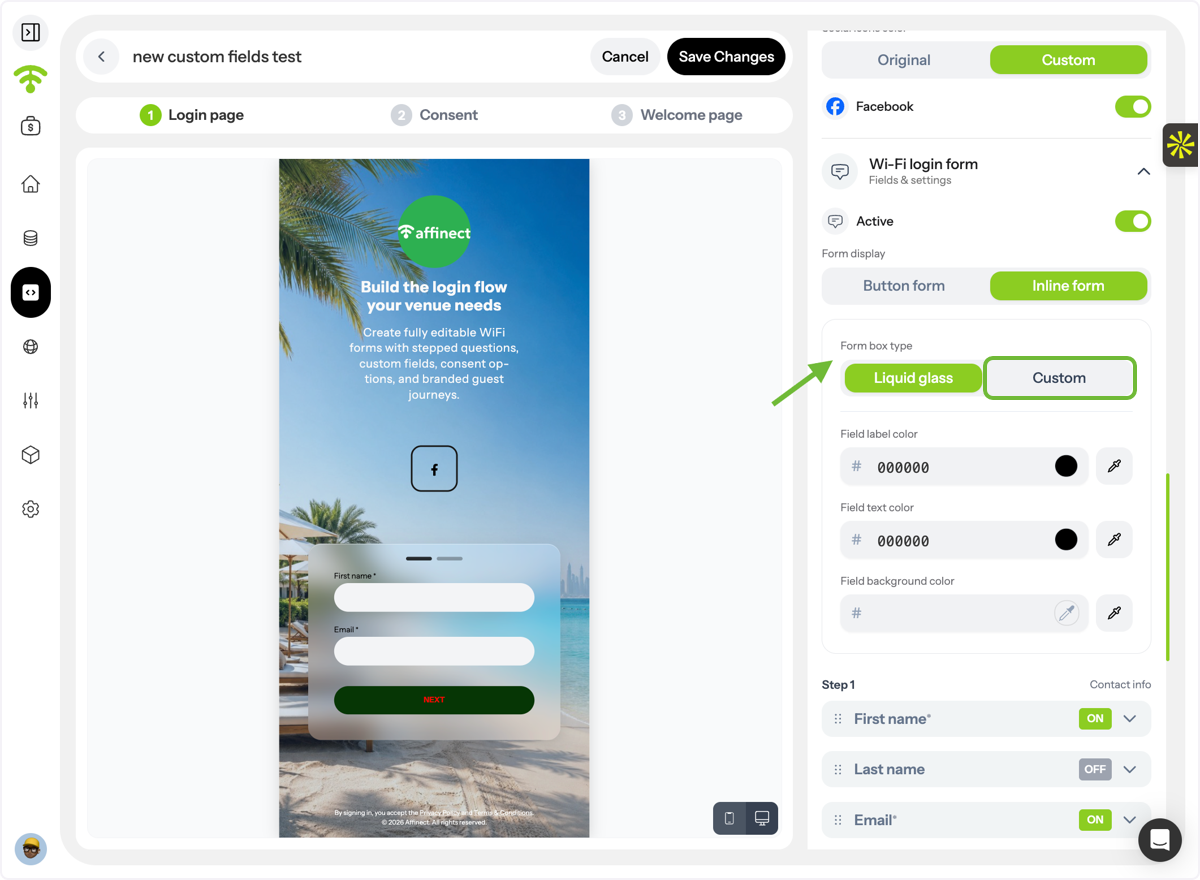
Customize Inline Forms
If using an inline form, choose the box style:
- Liquid Glass
- Custom
Customize Form Containers
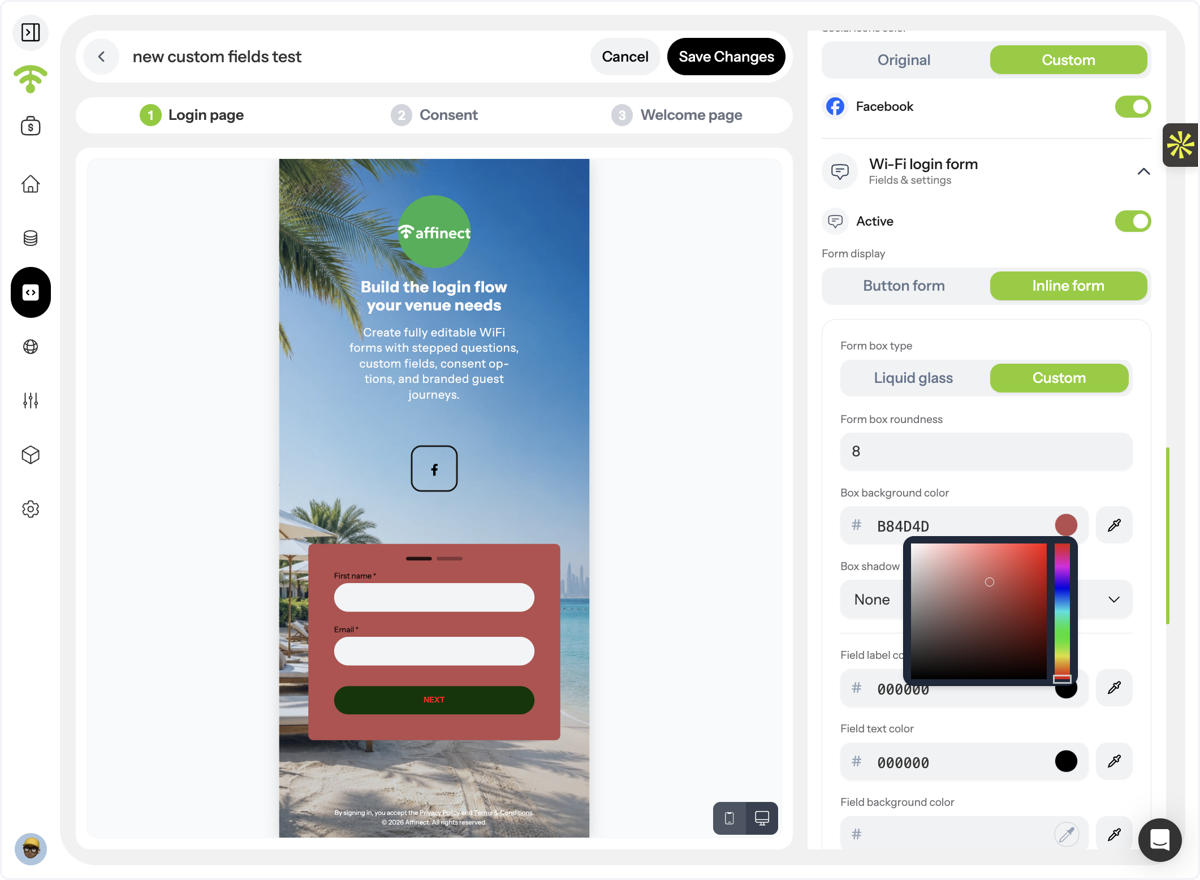
For custom box styles, configure:
- Background color
- Box shadow
Style Form Fields
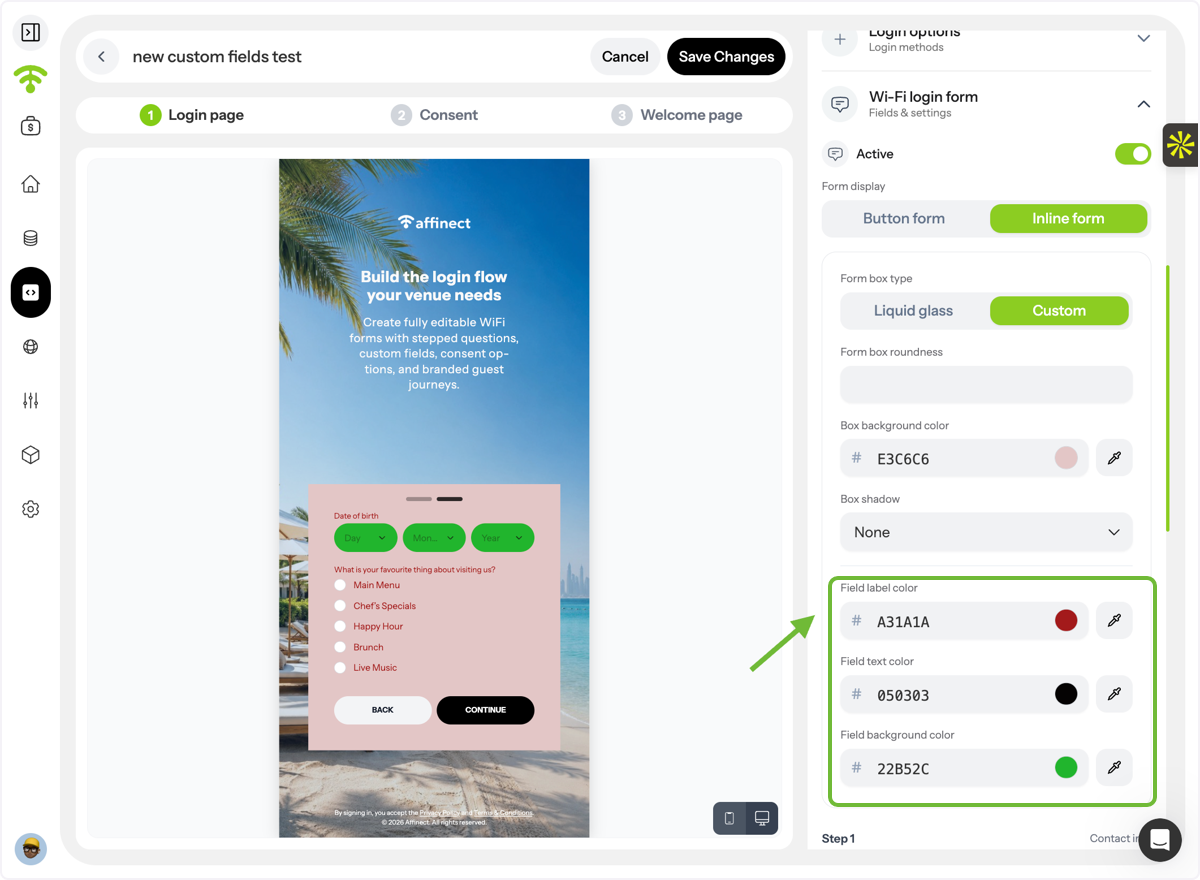
Customize:
- Field background color
- Label color
- Text color
Adding & Managing Form Fields
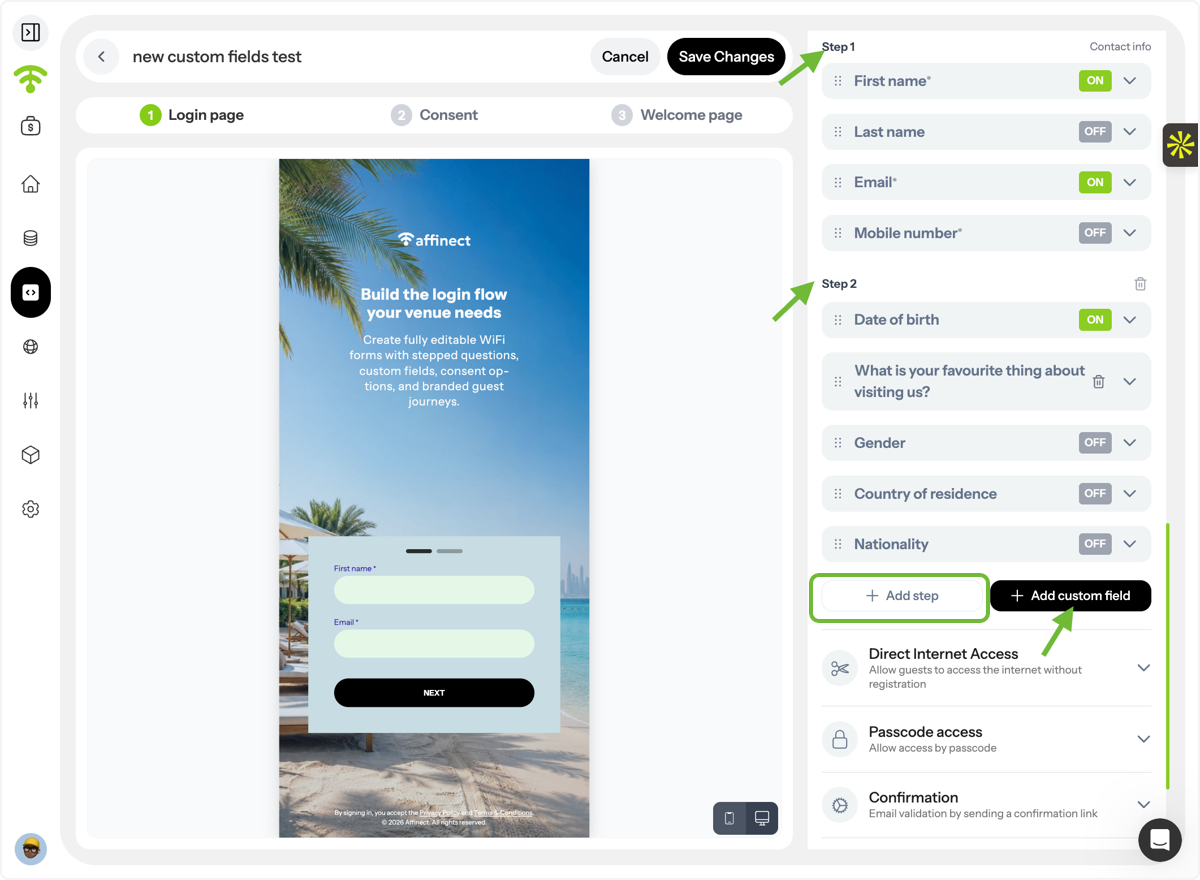
Create Multi-Step Forms
Add multiple steps to guide users through the data collection process.
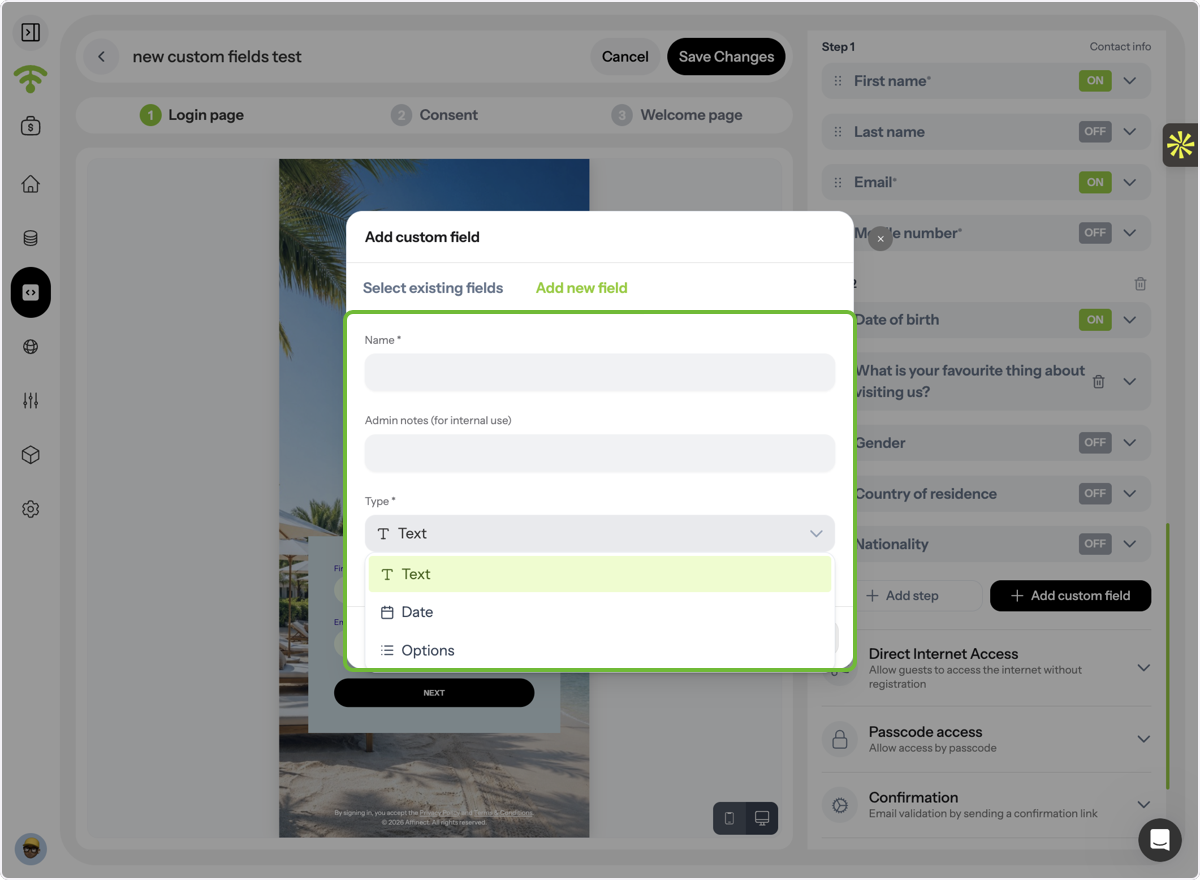
Add Custom Fields
You can:
- Select an existing field, or
- Create a new custom field
For new fields, define:
- Field name
- Internal notes
- Field type (Text, Date, Multiple Choice, etc.)
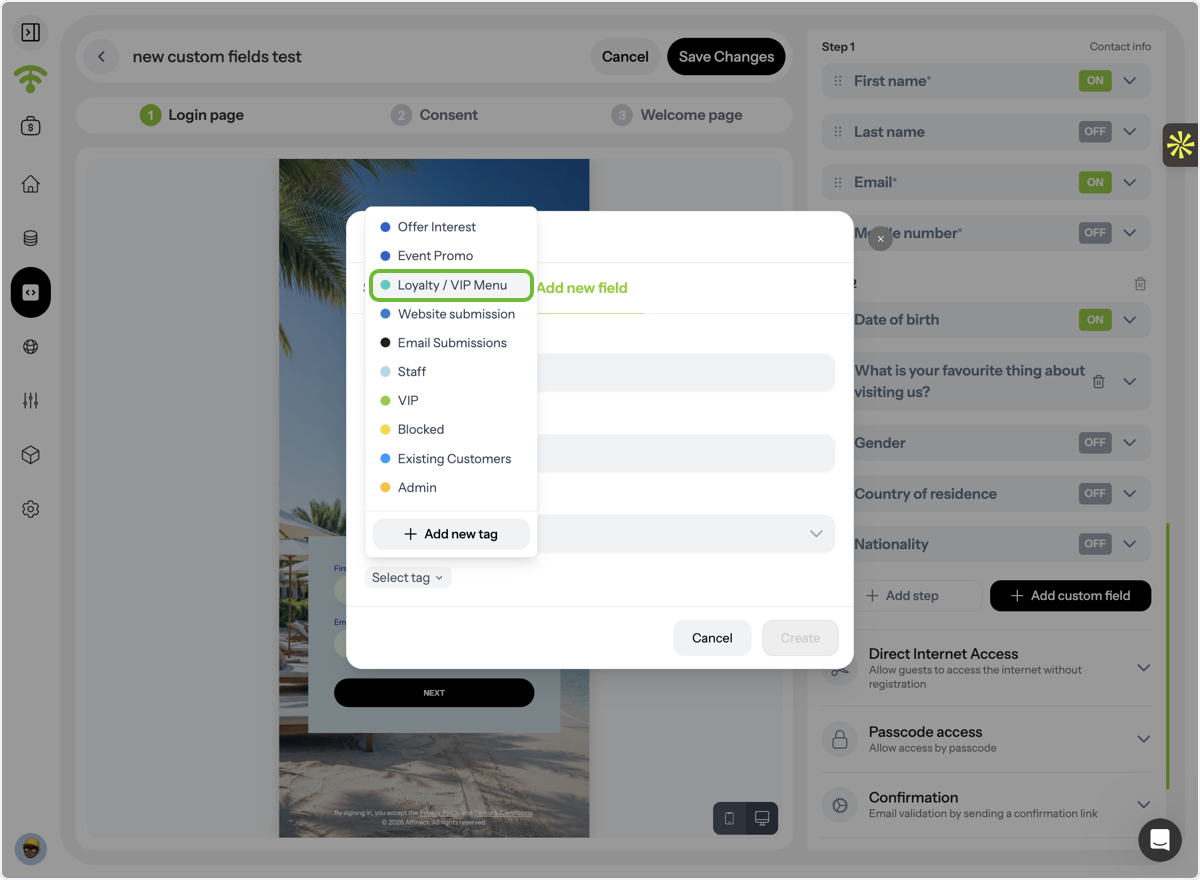
Assign Tags to Fields
Link tags to custom fields to improve audience segmentation and campaign targeting.
Configure Field Behavior
Choose whether a field should:
- Allow multiple selections
- Be mandatory for submission
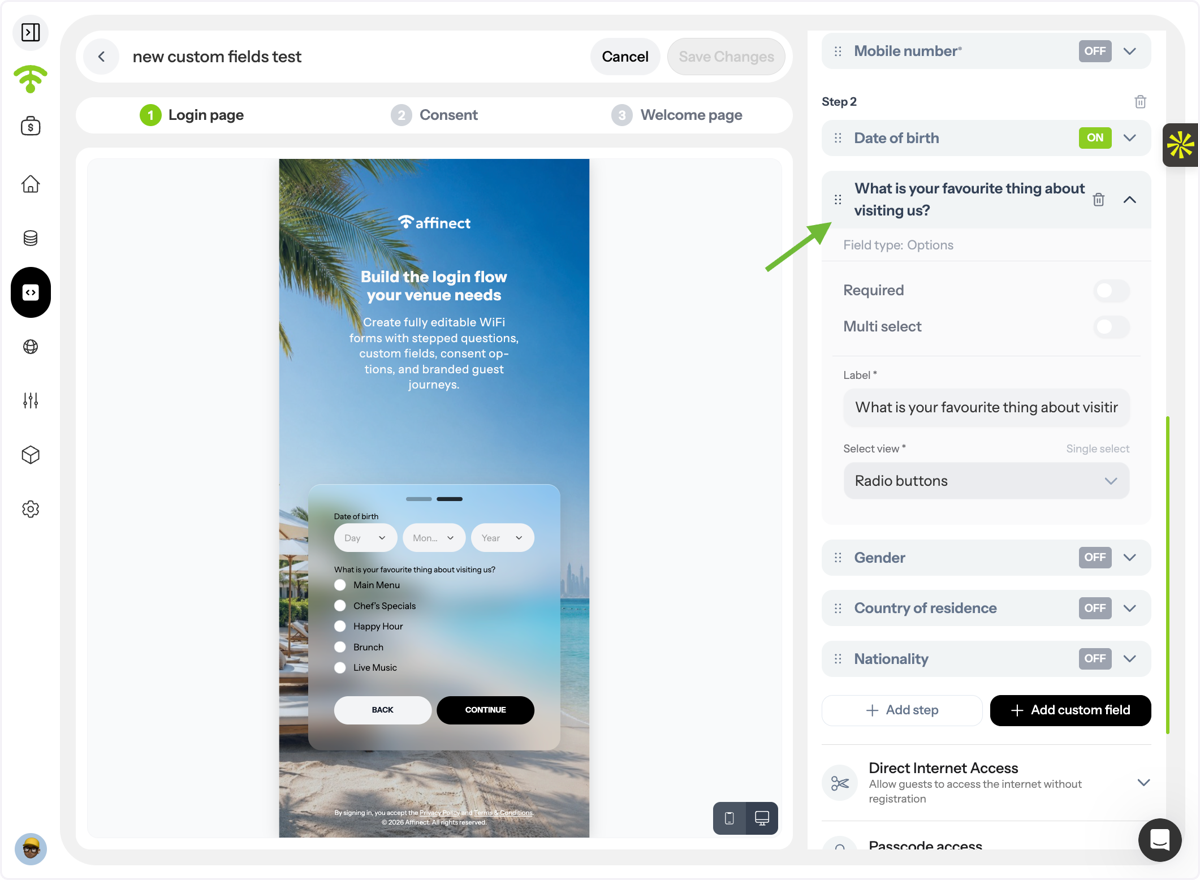
Customize Labels
Adjust how field labels are displayed to create a clearer and more user-friendly experience.
Tada! You're All Set!
Your WiFi login form is now fully customized to match your brand and data collection requirements. The same customization options are available for QR forms, allowing you to create a consistent experience across both WiFi and QR-based guest journeys.
For more advanced customization of Captive Portals or QR Landing Pages, refer to the related guides below.