Set up webhooks to automatically send real-time guest data from Affinect to your external systems.
Affinect
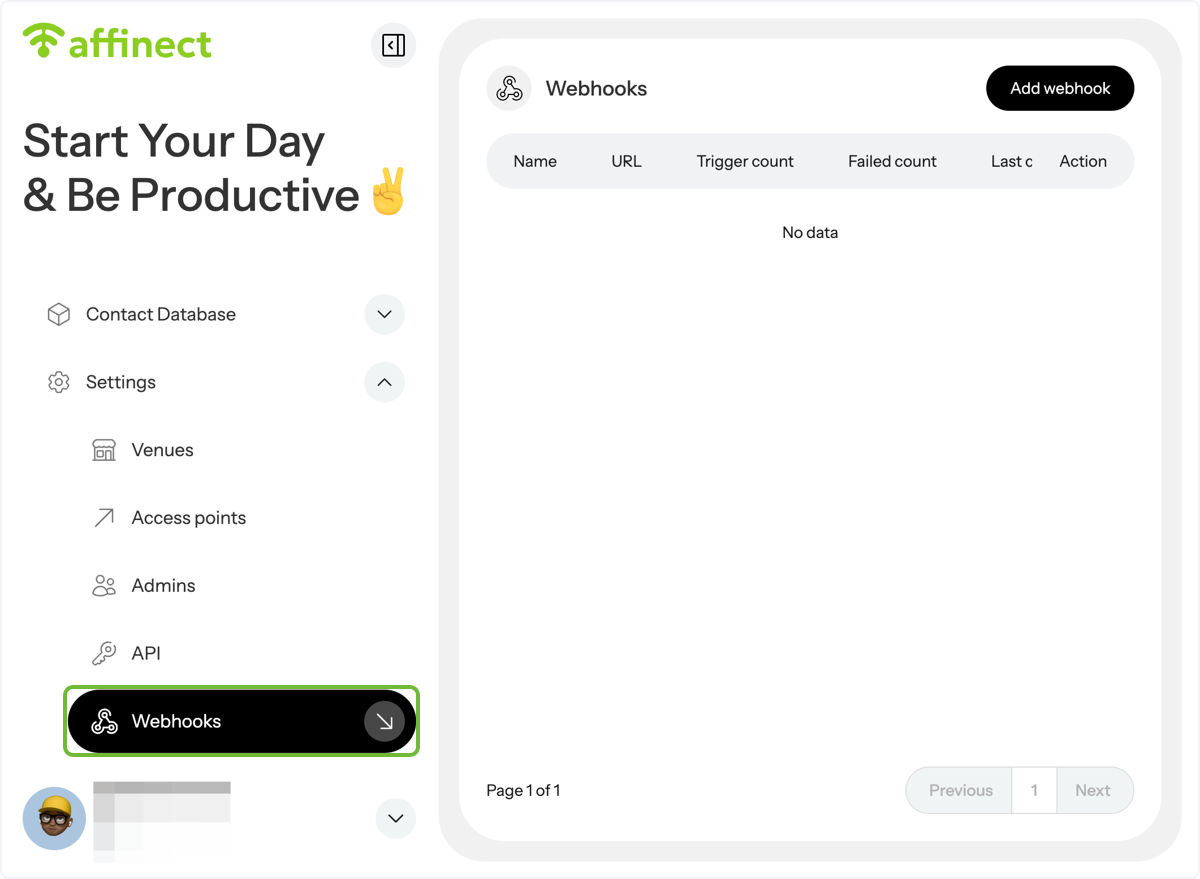
Click 'Settings' on the left-hand side of the dashboard and select Webhooks from the drop-down menu.
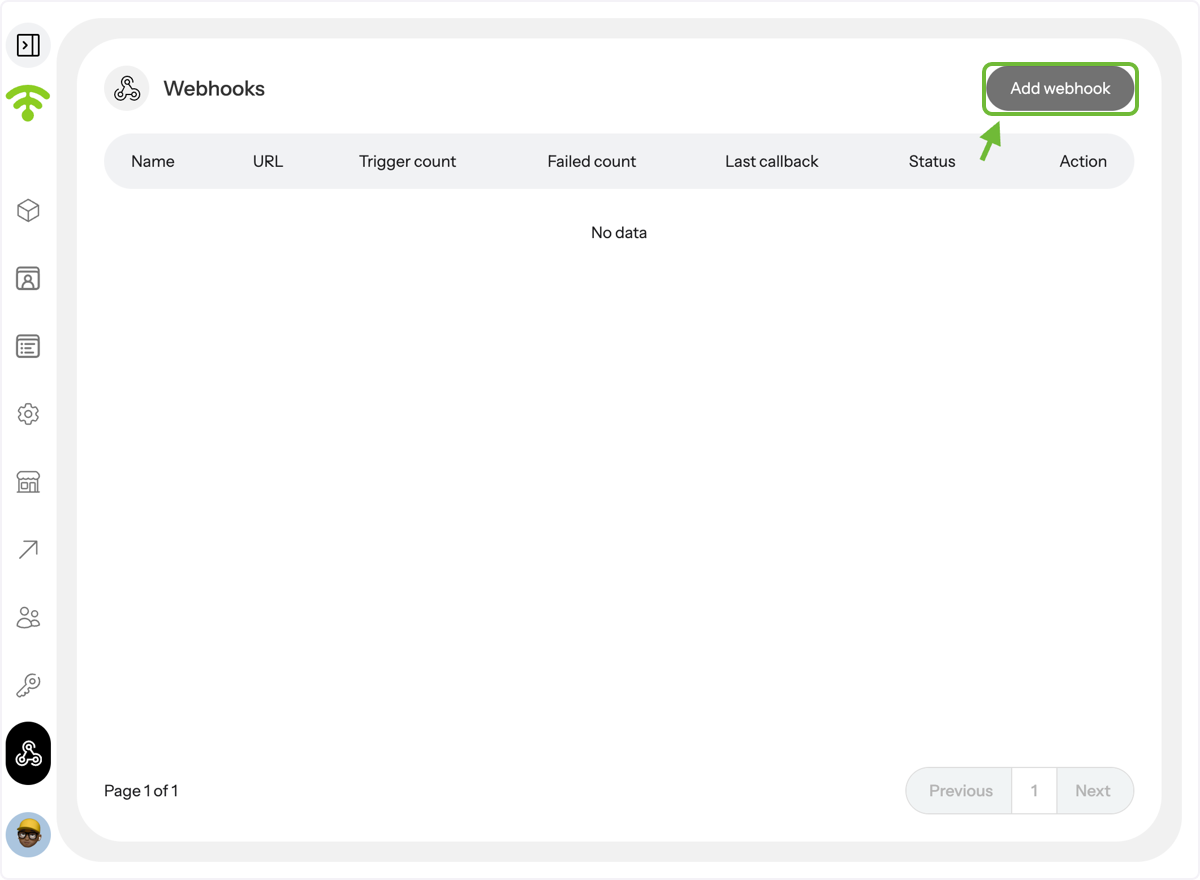
A preview of your added webhooks will appear \(if any\). Click on 'Add webhook' in the top right corner to add a new one.
Configuring the webhook
A configuration tab will appear where you can enter the webhook name, URL, and select events such as New Visitor or Returned Visitor. You can also specify venues and add a custom header as needed.
Webhook Status - set to inactive until you are ready to publish.
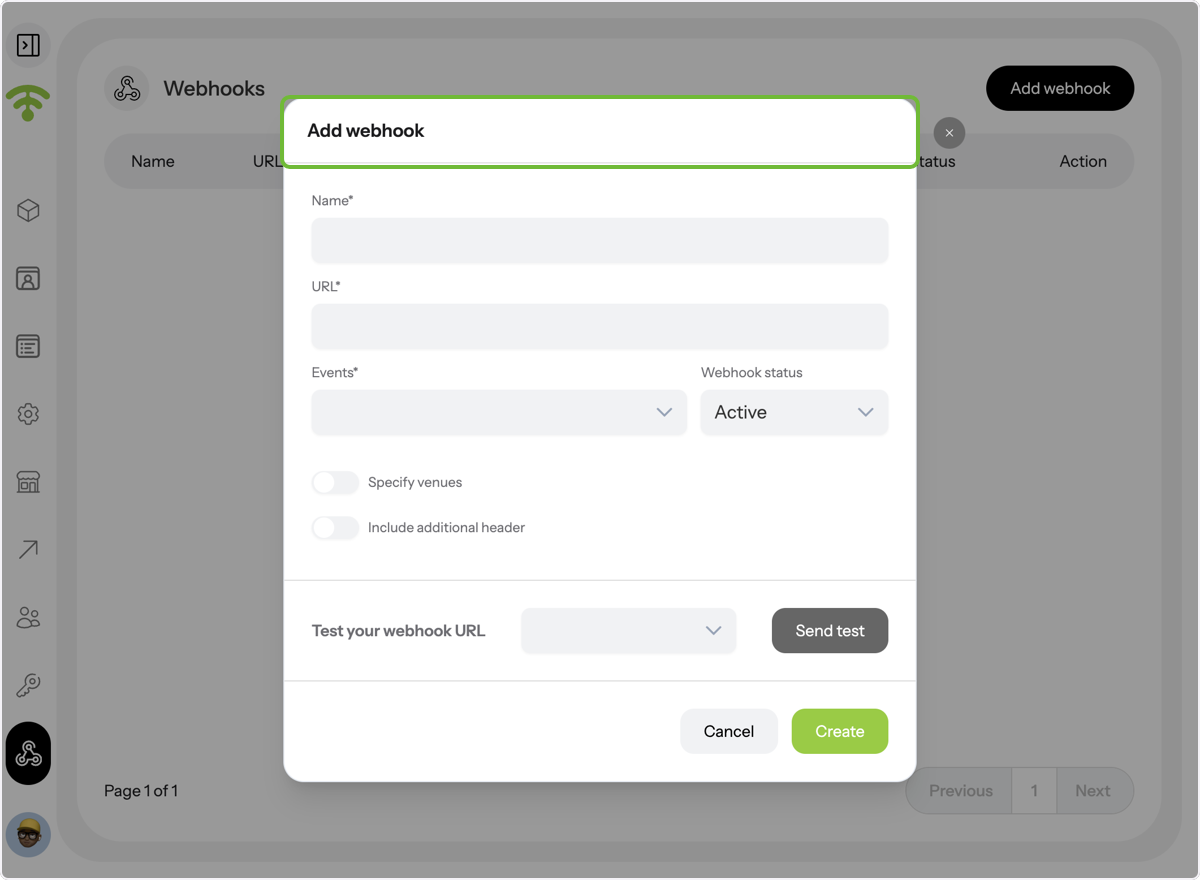
To test the webhook URL, select either New Visitor or Returned Visitor, then click 'Send Test' to verify the connection.
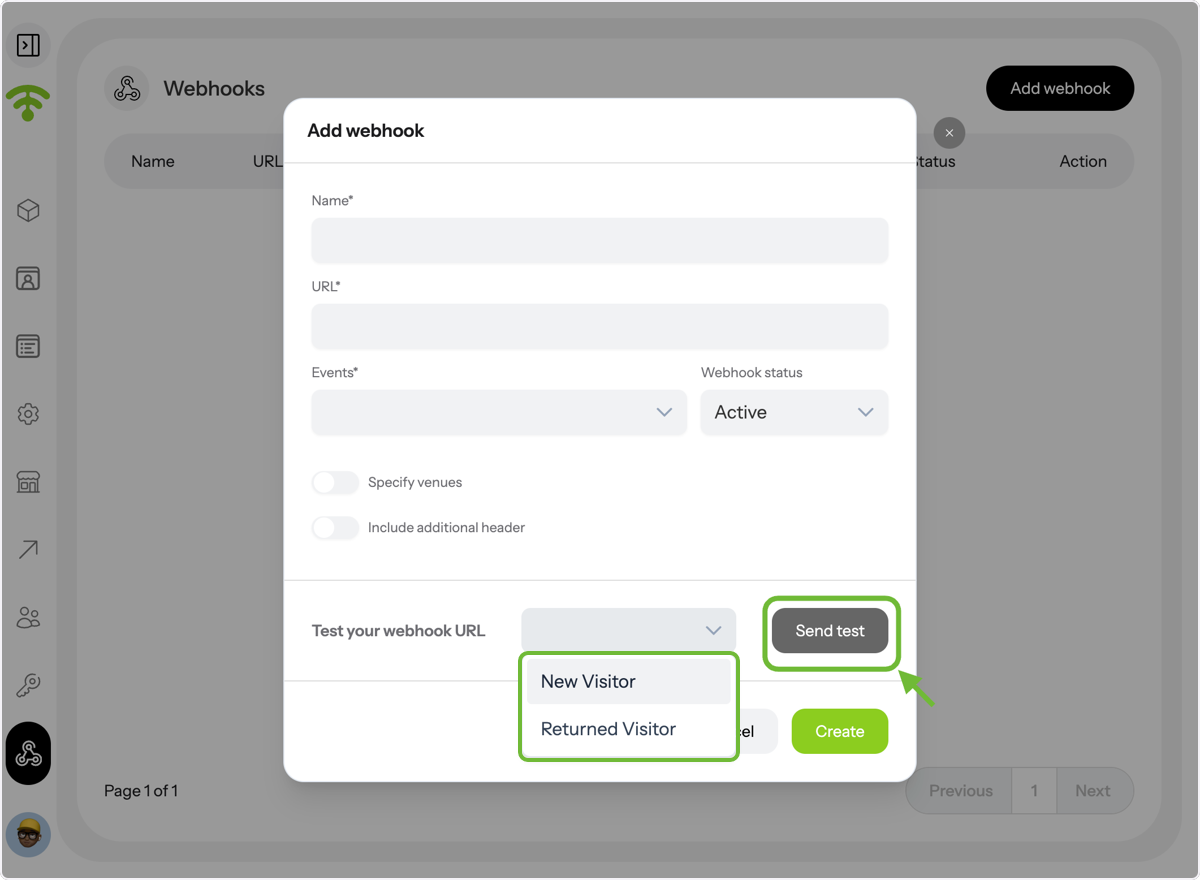
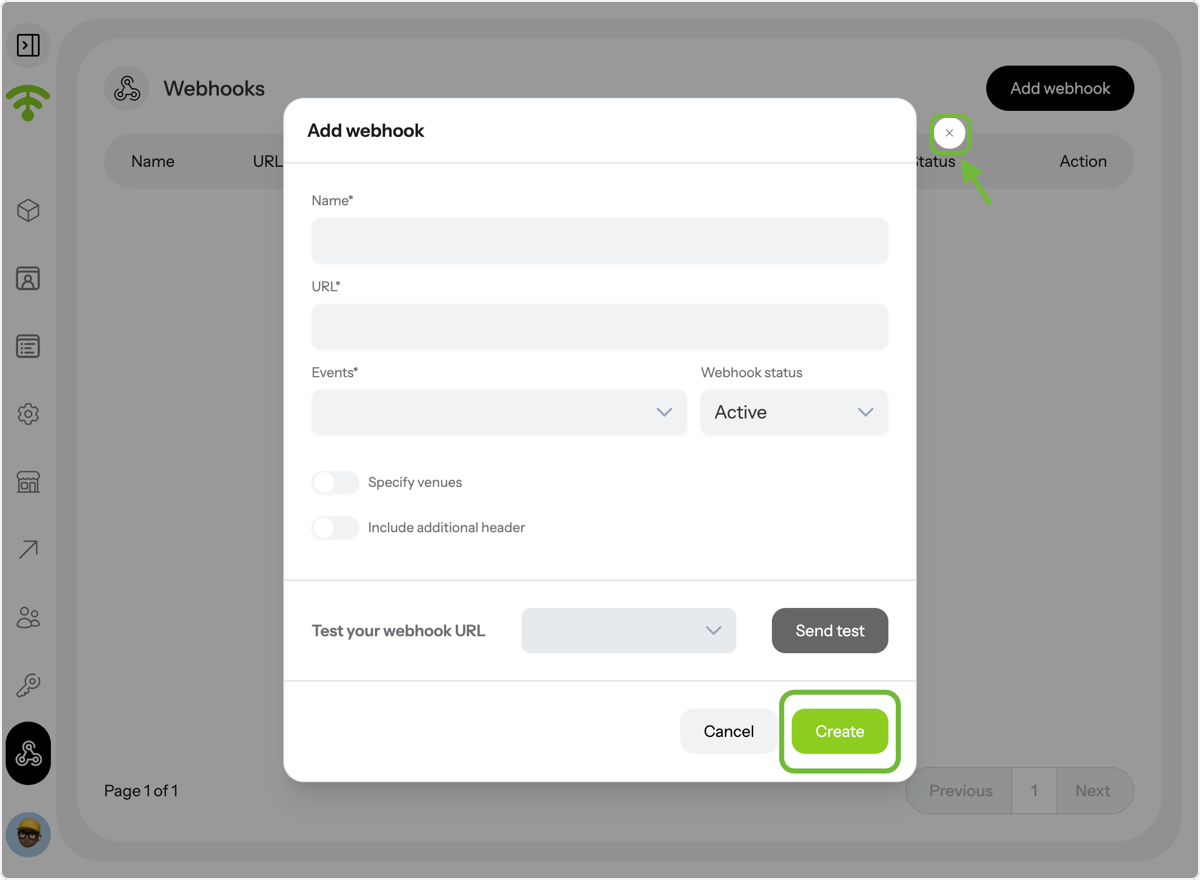
Once you're done, click 'Create' and close the tab by clicking the cross next to it. Tada! That's all. Happy Connecting and Adding Webhooks!